Get started with Galigeo For Lumira Discovery
Galigeo For Lumira Discovery is a performant, self-service Location Intelligence solution embedded within SAP Lumira Discovery.
It brings all the core features needed to create and consume compelling and meaningful geographical views of your data directly within Lumira Discovery.
The product is available for free .
Get started today by creating your first map and start getting faster insights with Location Intelligence.
1. Install Galigeo For Lumira Discovery
If not done yet, download Galigeo For Lumira Discovery from our website.
Once the download is complete, unzip the downloaded package.
Open SAP Lumira Discovery, and from the top-left menu, navigate to Extensions. It will open the Extension Manager modal. Click on Install at the top-right of the modal.
Navigate to the unzipped folder of the package you downloaded, and select the .zip file, and click Open.
Please wait during the installation is proceeding.
Once the installation is complete, you will see a new card in the Extension Manager called Galigeo Map.

Note that the number version might be different from the one in the above screenshot.
To finish the installation, close SAP Lumira Discovery.
2. Activate your license
After the installation was successful and you closed SAP Lumira Discovery, you need to activate your license in order to be able to use Galigeo For Lumira Discovery.
Navigate to the folder you unzipped after downloading the product at #step 1, and go into the Galigeo/GaligeoManager folder.
In this folder, you will find the Galigeo Manager, a desktop application used to manager the configuration of Galigeo For Lumira Discovery: license, catalog of geodata, …
For the moment, you will just focus on activating your license. Double-click on the galigeomanager.exe application.
Wait for the Galigeo Manager to start. Once opened, you will be prompted to activate your license by entering your professional email address.

Wait for a few seconds, a message at the top-right of Galigeo Manager will tell you that your license was successfully activated.
Close Galigeo Manager.
You are now on tracks to create your first map. Easy, wasn’t it ??
In this case, close Galigeo Manager, go to your main user folder (e.g C:/Users/<username>/), and delete the folder called GaligeoMaps. Then run the #step 2 once again.
3. Create your first map
Once you have successfully activated your license in the Galigeo Manager at #step 2, open SAP Lumira Discovery. Create a new document based on Excel datasource, and use the below sample dataset when prompted.
This dataset contains dummy sales data, that will help you understand the core concepts of how to plot data on a map.
Click on « Next » during all the steps when importing the Excel dataset. You end up in a new report with a blank canvas.
From the top menu of your canvas, click on « Insert Chart », select the « Extensions » tab, and click on the « Galigeo Map ».

A new Galigeo Map has now been added to the canvas. Galigeo behaving as any standard Lumira components, you can resize it as you want on your canvas.

Right-click on the Galigeo map and choose « Maximize ».
You have now a view of all the dimensions from the dataset, the different inputs used to « feed » the map with data, and the map itself.
In the dataset, we have coordinates available, contained in the « Latitude » and « Longitude » dimensions.
Drag and drop these two dimensions in the « Geodimension » input. Automatically, the Galigeo map will detect that these dimensions are geographical, and will display them on the map.
Your data are now displayed as points on the map. Good job ?!

For the moment, the points do not give us a meaningful information besides their locations and proximity.
Let’s go a little bit further by adding a KPI to the map.
Drag and drop the « Turnover » measure to the « Indicator » input.
The map is now displaying Proportional Symbols, also known as Geobubbles, where the size of the points is in correlation with its Turnover value.

4. Import your own geodata
Now that you have a first view of the data on the map, you may want to enrich it.
For example, looking at the dataset, you can notice that for each stores, besides its latitude and longitude, we also have the Wards where it is located. We can use Galigeo mapping capabilities in order to blend together this dimension and the values it contains with a geographic representation of the Ward (that is commonly called a geodata).
By default, Galigeo offers a default catalog of geodata, made of the main administrative boundaries of countries. You can access the complete list of default geodata by opening the Galigeo Manager, and clicking on the geodata tab.
But notice that Galigeo For Lumira Discovery lets you use your own geodata, which is a huge convenience if what you want to see on the map in not provided by default, or custom to your organization (e.g sales territories, pipelines, …).
For now, we are going to import ourselves a geodata suiting our needs.
By going on the Open Data portal of the city of London, you can download a geodata file representing the Wards as polygons (Unzip it after download is complete).
Save your document, close SAP Lumira Discovery, and open Galigeo Manager.
Open on the first tab on the left, and click Add Geodata. Click on File, navigate to the folder you downloaded the Wards file, and select it. Then click on OK.

You will now see all the Wards appearing. Now you just need to configure two fields in order to make it work in Galigeo.

The way it works, you will just need to define
- which dimensions from the geodata will be used to create a joint with your BI data
- keywords that will help Galigeo For Lumira Discovery to know which geodata it has to use based on provided dimensions
In our case, in the Layer Field input, we are going to select the « GSS_CODE » dimension, which contain unique code for the Wards.
Then in the Geodimension(s) input (that can be seen as a list of keywords) we are going to write the name of our BI dimension containing the Ward Code.
With this configuration, everytime you will drag and drop a dimension called « Ward Code » in Galigeo For Lumira Discovery, it will select the London_Ward geodata you imported in Galigeo Manager, and will blend your BI data with the Ward Code (GSS_CODE) values contained in the geodata.
Once you have correctly defined the configuration, don’t forget to click on « Save ». A message on the top-right will indicate you when the layer will be saved successfully.

You can close Galigeo Manager, start back SAP Lumira Discovery and open your previously saved document.
Drag and drop the « Ward Code » dimension below the Latitude and Longitude ones in the « Geodimension » input. Galigeo will analyze this new dimension: its name and the values in contains, and try to match it with one of the geodata it knows.
If it finds a match, it will load the geodata and blend the data from Lumira with it.
In this case, the Wards where data are available are loaded, and the « Turnover » KPI has been aggregated and displayed on them.

Nicely done. Now you are on tracks to create your own maps based on your data ?.
5. Going Further
You have now created your first map. It was easy, wasn’t it ??
This tutorial gave you a sneak peek of some of the features offered by Galigeo For Lumira Discovery.
In the next guides, you will be able to go further and create richer maps by leveraging the wide set of functionalities proposed by Galigeo like:
- Import multiple geodata to create a geo-hierachy
- Personalize the way your layers of information look like
- Animate your data with the buit-in Time Series module
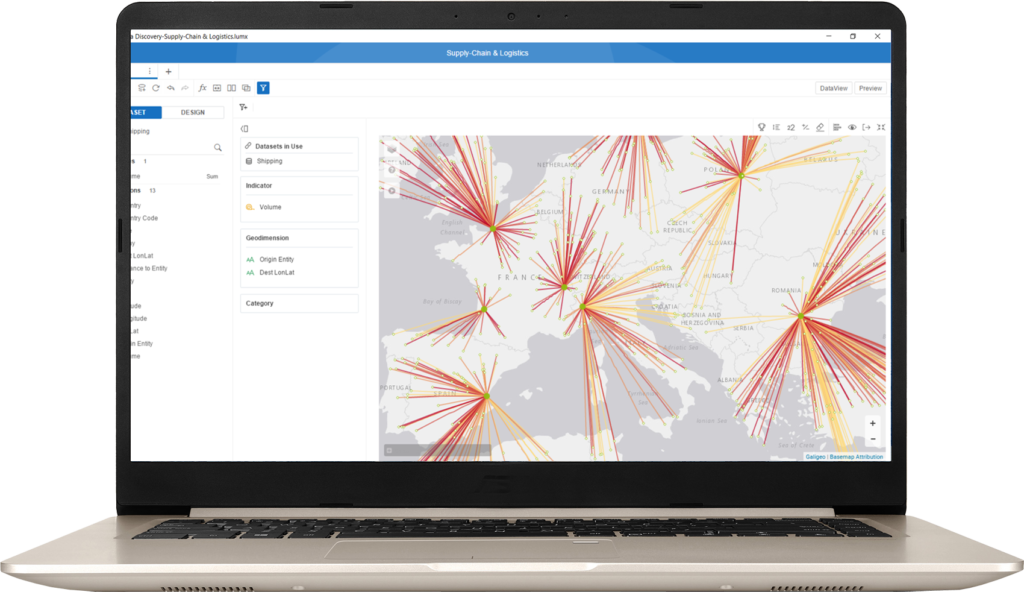
- Create advanced geovisualizations, like Flows
Freemium vs Premium
Access to Galigeo Support
Subscribe to our newsletter and stay tuned about Galigeo products and Location Intelligence